


The Art and Science of the Details
Details make all the Difference (sometimes)

Where we left off
In the previous post, we discussed adjusting the inseam lines of the Fremantle pants to be the same length1.

If our curved ruler is just a template with no tick marks, there would be no way to distinguish between these possibilities.
But our ruler has tick marks2. Inspecting the area closely, it is (hopefully) clear that in the first option, the tick mark meets the inseam stitching line at an angle. In the second option, the tick mark along the new crotch seam line has the same angle as the inseam.
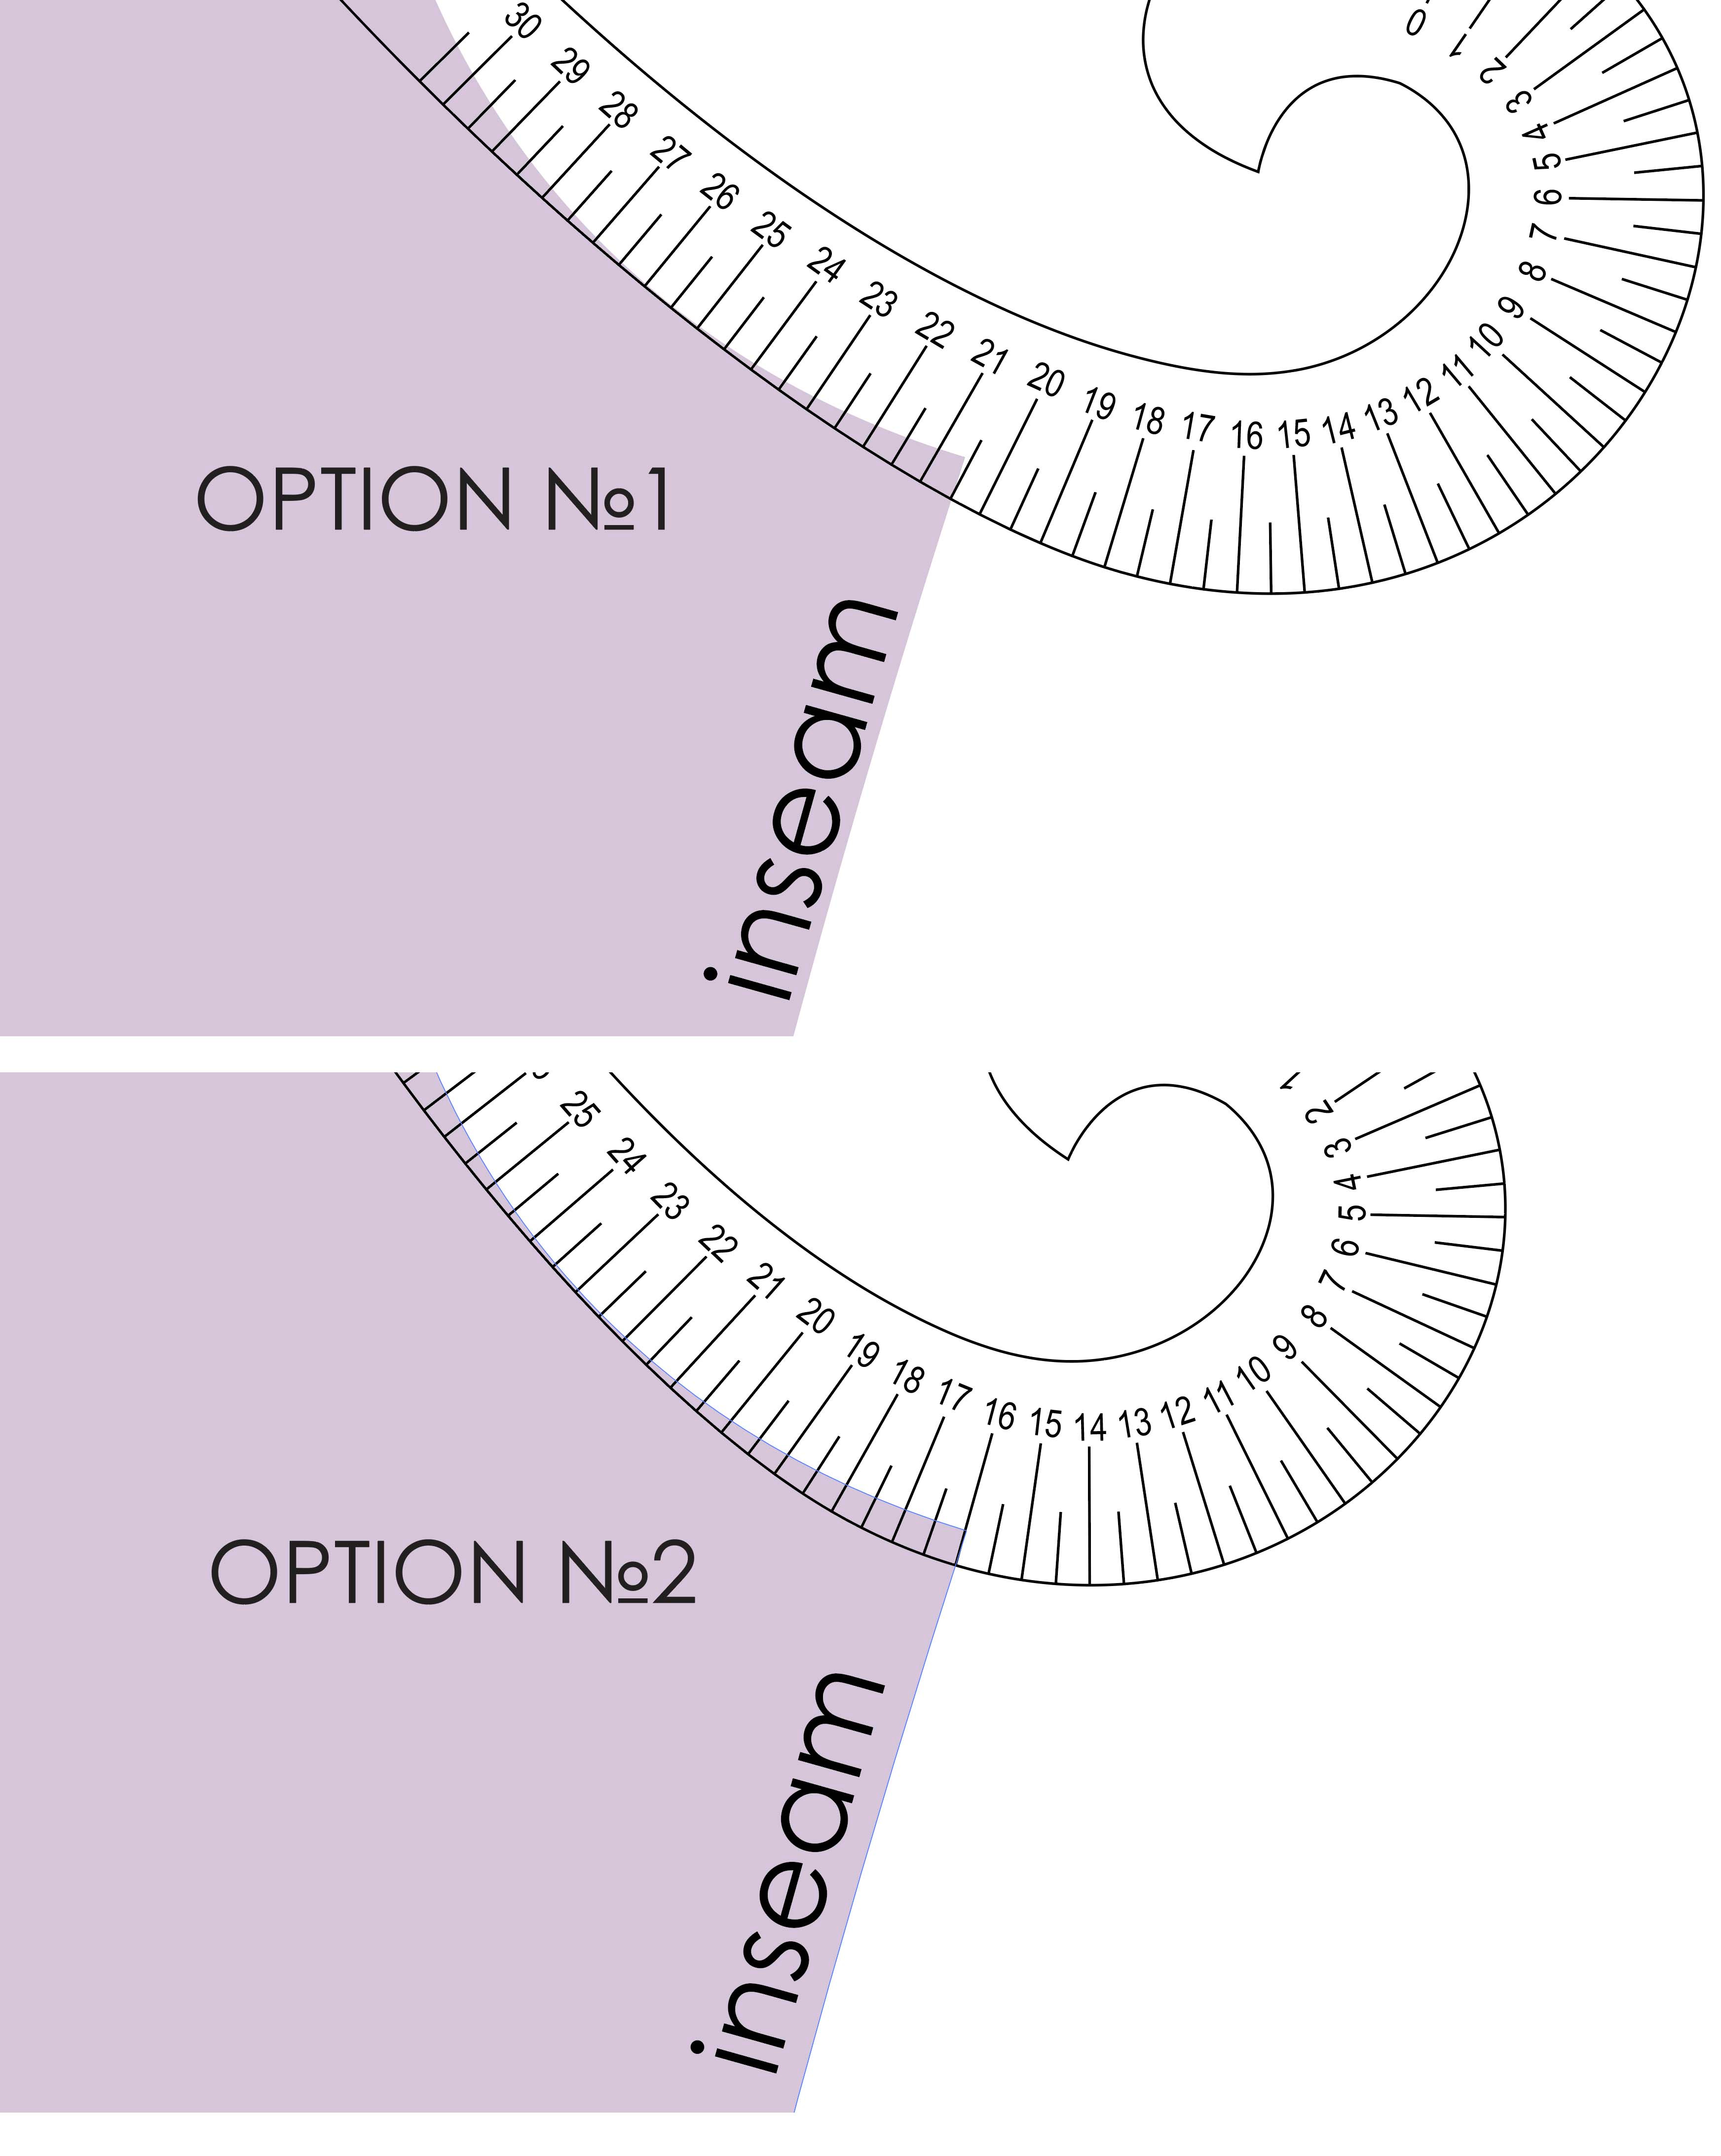
The fact that the perpendicular tick mark is an extension of the inseam line means that the angle of this intersection is 90˚. We can be confident this will result in a smooth line when stitched to the front. It is a more preferable adjustment to the first option IMO.
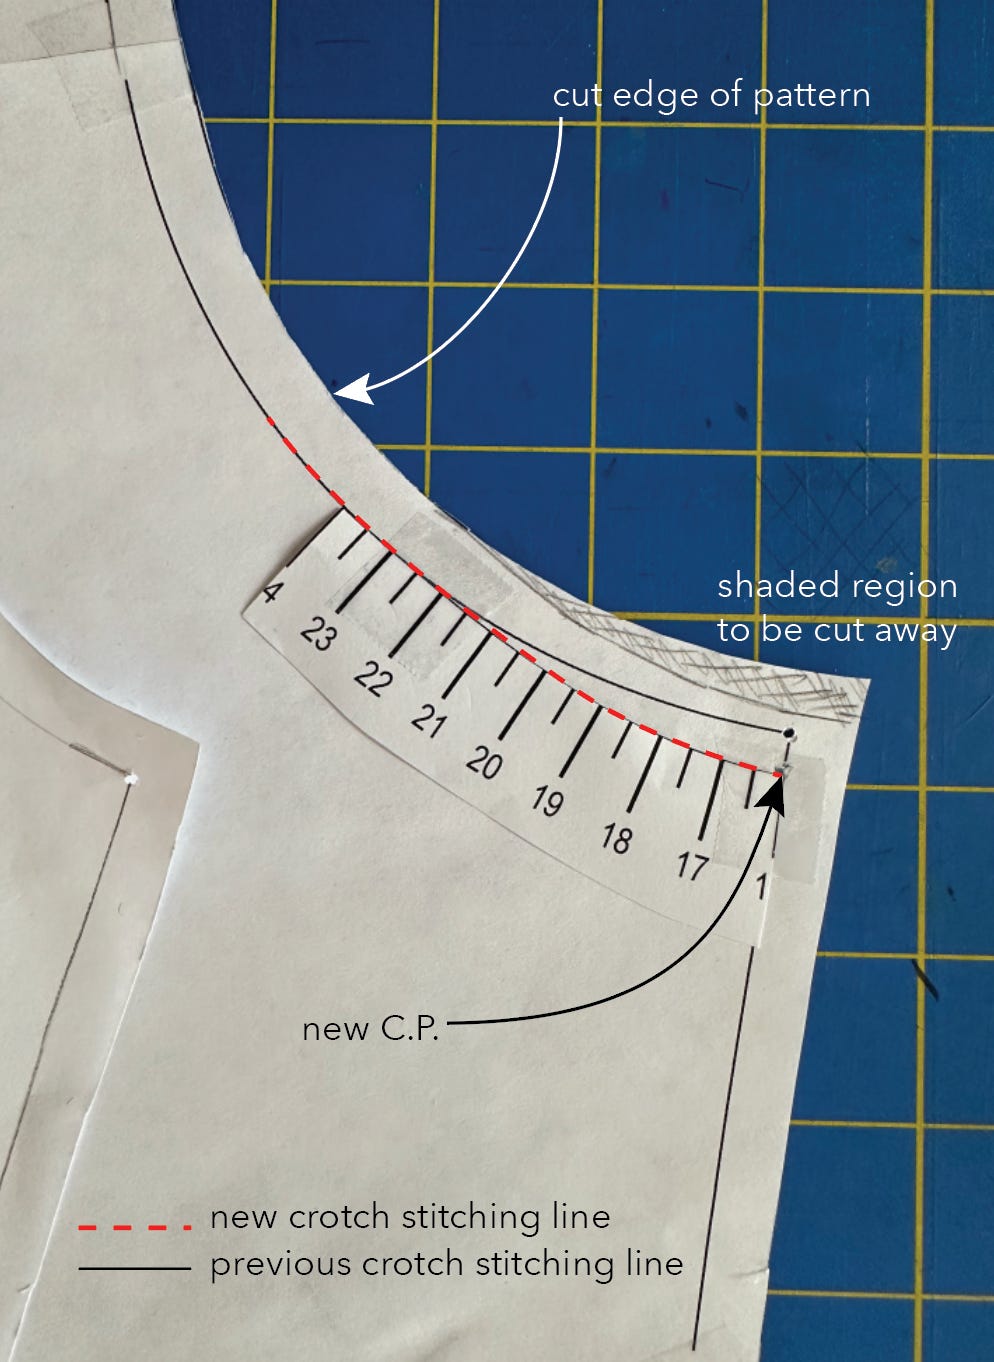
This is how my pattern looked after I finished:
How significant is such an alteration?
The difference in this case is subtle but it impacts the smooth transition between front and back at the crotch point. In turn, this can influence the fit as it influences the tension and distribution of ease along this seam. This difference also causes an 1.5˚ rotation as the front is stitched to the back at the top of the inseam. Athough yes, it is very subtle, once this is extended out along the crotch line when displaying the flat pattern pieces, this amounts to a 9 mm difference which can influence the drape and amount of horizontal ease in the crotch seam. The importance of grainlines!

This example also shows the importance of working with full scale pattern pieces. It is often very convenient to use quarter scale pattern pieces to illustrate adjustments. However this type of subtlety is barely noticeable at a smaller scale even though it can influence the fit of the full-scale garment.
I think that the impact of these types of adjustments are some of the reasons people can inadvertently get into difficulties with traditional pattern alterations (like slash and spread or scooping) when adjusting the crotch seam. When developing #TopDownCenterOut, I focused on the experience of the person who is making garments by themselves, for themselves so I searched for alternate ways to establish a productive fitting framework. Like every other seam or shaping element, any and all elements of the blueprint may need to be adjusted for a customized fit, but it is all in the details. Every Body-Design-Fabric relationship is unique.
Appreciating the Subtleties
It is so fascinating how the fit of a garment can be dramatically impacted by small changes in certain spots, while changes of the same magnitude in other areas are barely discernible. I don’t think I would notice if my pant leg opening changes by a few millimeters but something like 9 mm at the crotch has a big impact.
Utility of the Curved Fashion Ruler
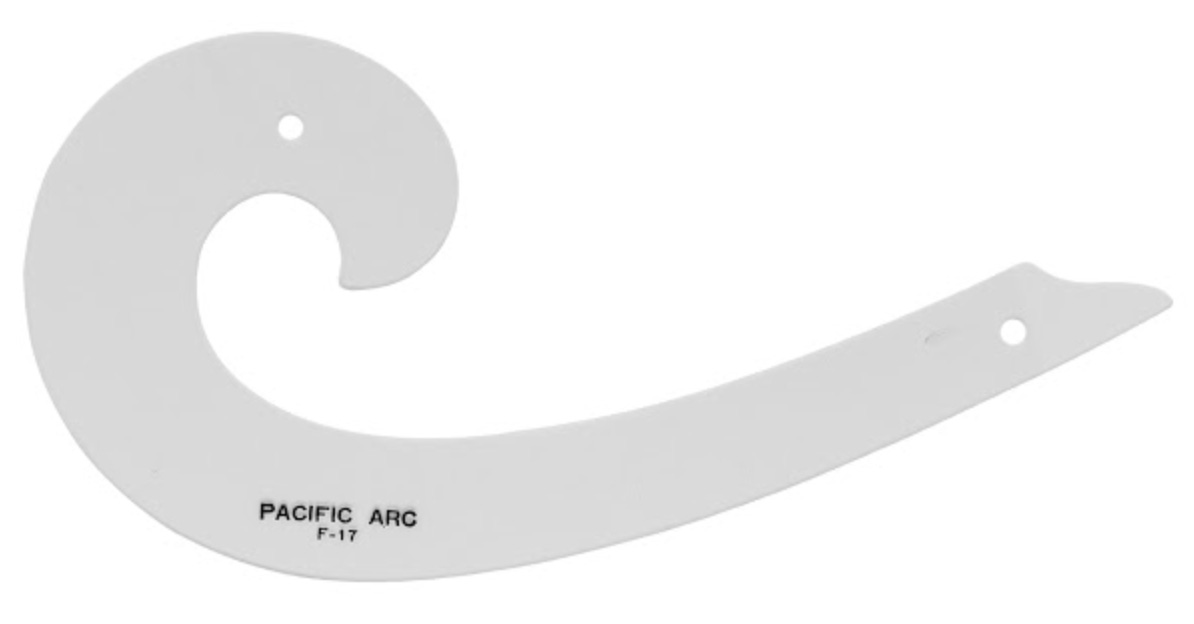
I hope this exercise shows the value of having a curved fashion ruler that includes tick marks. The ruler I used here is the classic one used in fashion schools, the Dietzen #17 French curve.
Download your digital French curve ruler here. (Note download is for paid subscribers only)
Coming Up
This weekend we are zooming on the Fremantle pants. This post has the details and I look forward to connecting.
The topic I would like to cover this weekend is a refresher on fitting the crotch seam in #TopDownCenterOut. This is in response to some questions I have received and from recently watching this DVD where the advice is to fit pants from the crotch up to the waist.

Watching this video helped me to understand why some people coming from a traditional fitting background can find #TopDownCenterOut challenging. Because so many aspects will be familiar (eg making a toile, adding onto the waistline) that it is easy to dismiss the importance of the key distinctions. Once you understand that the crotch is a line and not a shape then the rationale for the differences in #TopDownCenterOut becomes clearer. Details matter!
Some pants and trouser patterns will. have seams of different lengths, it is not uncommon for the back inseam to be stretched to fit the front inseam. Importantly, this should be indicated on the pattern with notches and mentioned in the pattern directions.
Tick marks are short lines perpendicular to the edge of the ruler.